


Good tile looks effortless because the hard thinking happened before the first piece went up. We plan every wall, edge and niche so your shower and bathroom walls look straight, balanced and finished from every angle.
Key takeaways
- A tile job looks custom when the layout is planned first: centered on the focal wall, cuts hidden and fixtures on grout lines.
- Tile and grout aren't waterproof; the membrane behind them is what keeps water out of the wall.
- Inside corners and tub joints get flexible sealant, not grout, so seasonal movement doesn't crack them.
- Large rectangular tile usually needs a limited offset, and herringbone or mosaics add labor.
Tile is the surface everyone sees and remembers. It's also where shortcuts show up first: a sliver of a cut at the top of a wall, grout lines that drift out of level, a niche that cuts a tile awkwardly in half, a raw edge where the tile simply stops. Bathroom tile installation done well avoids all of those, and it starts with a layout drawn before the first bag of mortar is mixed.
This page covers wall tile in bathrooms: shower walls, tub surrounds, accent walls and wainscot. For floors, see our bathroom flooring page. For tile work elsewhere in the home, such as backsplashes, fireplaces and living areas, see our general tile installation service.
Layout Comes First
Before setting anything, we decide where every grout line will fall. That sounds fussy, but it's what separates a tile job that looks custom from one that merely looks covered. Our layout process includes:
- Centering on the focal wall. The back wall of the shower, the one you see from the doorway, gets the layout centered so cuts on both sides match.
- Placing the cuts where nobody looks. Thin slivers end up in corners or at the ceiling line only if there's no better option. Often we shift the layout half a tile to avoid them.
- Aligning with the fixtures. The valve trim and showerhead look best when they land at the center of a tile or right on a grout joint rather than at a random spot.
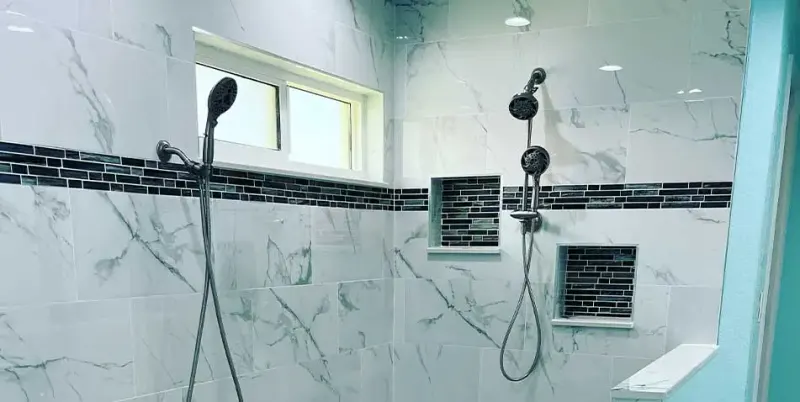
- Sizing niches to the tile. A niche framed to exact tile dimensions lets grout lines run straight through it, with no awkward cuts around the opening.
- Setting a level starting line. Tubs and floors are rarely perfectly level, so we establish a level line instead of following the tub deck, and handle the difference in the bottom row.
Signs It's Time for New Bathroom Tile
- Grout keeps cracking or falling out, even after regrouting.
- Tiles sound hollow when tapped, or they've started to loosen.
- There's staining or soft drywall on the other side of the shower wall.
- Caulk at the tub or corners fails again within months.
- The tile is sound but dated, and you're remodeling anyway.
Tile Choices for Bathroom Walls
| Tile | Why people choose it | Installation notes |
|---|---|---|
| Porcelain | Dense, low absorption, huge range of looks including marble and stone | Large formats need flat walls and full mortar coverage |
| Ceramic | Wide color range, classic subway shapes, easy to cut | Fine for walls; check ratings before using it on floors |
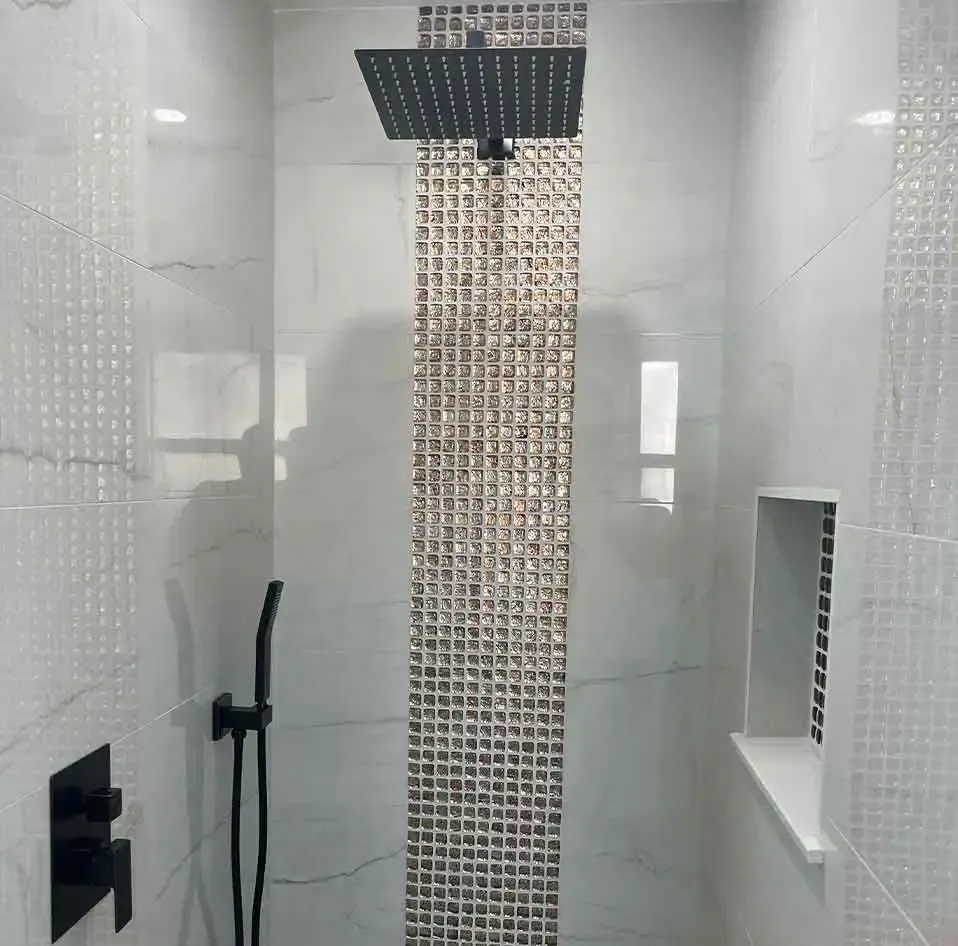
| Glass mosaic | Shimmer and color, great for accent bands and niches | Needs suitable mortar and careful grouting to avoid haze and gaps |
| Natural stone | One-of-a-kind character | Requires sealing and gentle cleaners; heavier and softer |
For a deeper comparison, read our guide to bathroom tile types, and for design inspiration, browse shower tile ideas.
Details That Finish the Job
Trim and edges
Wherever tile ends without meeting a wall or ceiling, it needs a finished edge. Options include bullnose tile, metal or PVC profiles in a finish that matches your fixtures, or pencil liners and chair rails for a traditional look. We choose the edge treatment at the same time as the tile, because it affects how far the tile extends and how the outside corners are built.
Patterns and offsets
The pattern changes both the look and the labor. A stacked layout is clean and modern; a classic offset suits subway tile; a vertical stack makes a low ceiling feel taller; herringbone and chevron add movement. Large rectangular tile usually needs a limited offset, often a third of the tile rather than half, because many long tiles have a slight bow that shows as lippage at a half offset. Follow the tile maker's guidance for your product. Herringbone, chevron and mosaics take more cuts and more time than a straight lay.
Niches
A niche framed to the tile layout looks planned, with grout lines running straight through it. It can be finished in the field tile, an accent tile or a contrasting stone shelf. The framing and waterproofing details live on our walk-in shower page, which explains how we build shower niches.
Accent bands and feature walls
A vertical mosaic strip, a horizontal band at eye level, or a single feature wall in a bolder tile adds interest without overwhelming a small room. Accent bands look intentional when they line up with the niche, the valve or the top of the glass, so we plan them together.
Movement joints
Where tile meets a tub, a change of plane (like an inside corner) or a different material, the joint gets a flexible sealant instead of grout. Buildings move slightly with temperature and humidity, and rigid grout in those spots is a common reason tile cracks along corners. Our guide on why shower tile fails covers this and other causes.
What's Behind the Tile Matters More
Tile and grout aren't waterproof on their own. Water passes through grout joints and has to be stopped by what's underneath. In showers and tub surrounds, we install tile over cement board or foam board with a continuous waterproofing membrane, never over plain drywall. That's the subject of our shower pans and waterproofing page, and the guide article why waterproofing matters more than tile.
Walls also need to be flat. Large-format tile in particular shows every bump and hollow as lippage, where one tile edge sits proud of its neighbor. We check walls with a straightedge and correct framing or backer board before tiling.
Grout: Color, Type and Width
- Color. Grout that matches the tile makes a wall read as one surface; contrasting grout highlights the pattern. Lighter grout shows soap and mildew sooner in showers.
- Type. Cement grouts are typically sealed; premium and epoxy-based grouts resist staining but are less forgiving to install. Our guide on grout types compares them.
- Width. Tighter joints suit rectified tile with precise edges; tiles with more size variation need slightly wider joints so the lines stay straight.
Beyond the Shower: Wainscot and Feature Walls
Tile doesn't have to stop at the shower. Wainscot, tile running partway up the walls around the room, protects the drywall behind a toilet or vanity from splashes and gives a powder room or kids' bath a finished, durable look. A full-height tile wall behind the vanity can act as a backsplash and a focal point at the same time. In these dry areas, the backing can usually be standard or moisture-resistant board rather than a full shower waterproofing system, but the same layout rules apply: level lines, balanced cuts, and a clean top edge with a cap, liner or metal profile. If the wainscot meets the shower tile, we plan the two so the heights and grout lines connect.
Tile as Part of a Bigger Project
Bathroom tile work usually happens within a shower remodel, a new walk-in shower or a full bathroom remodel. We can also retile a tub surround or wainscot on its own if the wall behind it's sound. Tiling over old shower tile is a different question, and usually not a good idea; our guide on tiling over existing tile explains why.
How a Bathroom Tile Job Runs
- Layout mockup. We mark the centerlines, cut positions, niche and accent band on the wall and confirm them with you.
- Substrate check. Walls are checked with a straightedge, and framing or backer board is corrected until they're flat.
- Waterproofing. In wet areas, the membrane goes on and cures before any tile is set.
- Setting. Tile goes up from a level line with full mortar coverage, plus trim pieces at every exposed edge.
- Grout. Joints are grouted and the haze cleaned off.
- Movement joints. Corners, the tub joint and changes of plane get flexible sealant.
- Cure time and cleanup. We tell you when the shower is safe to use, based on the products installed, and leave the room clean.
What Affects the Cost
Two showers with the same square footage can price very differently. The main drivers are:
- Tile size and type. Large-format porcelain needs flatter walls and more handling; natural stone needs sealing; glass mosaics need extra care.
- Pattern. Herringbone, chevron and diagonal layouts mean more cuts than a straight lay.
- Details. Each niche, accent band, bench and outside corner adds trim pieces and labor.
- Wall condition. Out-of-plumb or damaged walls must be corrected before tile goes up.
- Waterproofing system. Membrane type and how much of the room it covers.
Our guide on bathroom remodel costs puts these in context.
Keeping New Tile Looking Its Best
Squeegee shower walls after use, run the exhaust fan, and clean with pH-neutral products. Avoid acidic cleaners on natural stone and on cement grout. If the grout ever needs a reset, our tile and grout cleaning team can deep-clean, seal or regrout it. Michael Wojcik wrote that Shaun "is very knowledgeable about tile and marble and your construction needs."
If you have a tile in mind, or no idea where to start, we'll help you plan the layout and give you a free estimate.
Related Bathroom Services
What Clients Say
“Today's Home Services were very professional and caring about the outcome of our bathroom remodeling. The employees were respectful, friendly and knowledgeable. I will be using them again as we keep updating our home. It was nice to find a honest, hard working contract that will work at a reasonable price!”
— Greg Ferguson
“Today's Home Services did an outstanding job re-grouting my 18 year old bathroom walls and floor. My bathroom looks brand new. The two men who performed the work were friendly, hard-working and extremely professional. It is refreshing to have work done that is hassle free. I intend to use them to re-stain the tile flooring in my home as well.”
— Renee Huntley
Bathroom Remodeling Near You
We remodel bathrooms throughout four Gulf Coast counties. Find the page for your community:
Learn More Before You Start
Bathroom Tile FAQs
How do I choose grout color for shower tile?
Do you install tile I buy myself?
Do large tiles work on shower walls?
What's the best way to finish the edge of the tile?
How long before I can use a newly tiled shower?
Keep Exploring
-
Bathroom Remodeling in Bradenton, Sarasota & the Suncoast
From a tired hall bath to a complete primary-suite rebuild, we plan, demo, waterproof, tile and finish bathrooms across Manatee, Sarasota, Charlotte and south Hillsborough counties,…
-
Tile Installation
Good tile work is mostly invisible: flat floors, straight lines, tight even grout joints and no hollow spots. We spend the time on layout and surface…
-
 Ideas
12 Shower Tile Ideas, With the Fine Print
Twelve ways to tile a shower, each with the reason it earns its place and the practical catch: grout lines to clean, layout demands, slip resistance…
-
 Understanding
Bathroom Tile Types and Where Each One Belongs
Tile is sold by look, but it should be chosen by behavior. How much water a tile absorbs, how hard its surface is and how it…
-
 Bathroom Service
Bathroom Flooring Installation
A bathroom floor takes splashes, steam, dropped bottles and daily traffic. We replace it with tile or waterproof vinyl laid over a flat, sound base, with…
-
 Questions
Can You Tile Over Existing Tile?
Technically yes, in limited situations. On a flat, well-bonded floor or backsplash, an overlay can work. Inside a shower, or anywhere the old tile is loose,…