

Tile and grout are the part of a shower you see, but they aren't what keeps water in. That job belongs to the pan and the waterproofing beneath them, and when they fail, the damage spreads quietly.
Key takeaways
- Grout is porous; the pan underneath decides where water goes, so a failed pan can't be fixed from the surface.
- Stains that appear after floor-only water use point to the pan; leaks every time the valve runs point to plumbing.
- Every pan we build is flood tested before tile, while the waterproofing is still easy to fix.
- New floor waterproofing has to tie into the walls, so lower wall tile usually comes out with the pan.
A failed shower pan rarely announces itself with a flood. It shows up as a baseboard that keeps swelling on the other side of the wall, grout along the floor that never dries, or a musty smell that cleaning doesn't remove. By then, water has usually been getting past the tile for a while. Shower pan replacement removes the damaged floor assembly, finds out how far the water traveled, and rebuilds the base with a waterproofing system that's tested before a single tile is set. Today's Home Services builds tiled showers across Manatee, Sarasota and nearby counties, and the pan is the part of that work we take most seriously.
What a Shower Pan Actually Is
In a tiled shower, the "pan" is the whole floor assembly beneath the tile:
- A slope toward the drain, typically about 1/4 inch per foot, so water never puddles
- A waterproof layer, either a liner buried in mortar or a membrane bonded right under the tile
- A drain designed to connect to that waterproof layer and carry away any water that reaches it
- A curb or threshold that's waterproofed as carefully as the floor
The tile and grout on top are a wear surface. Grout is porous, and some water always passes through it. The pan is what decides where that water goes next.
Signs Your Shower Pan Has Failed
- Water stains, peeling paint or swollen baseboards in the room next to the shower
- Stains or damp spots on the ceiling below an upstairs shower
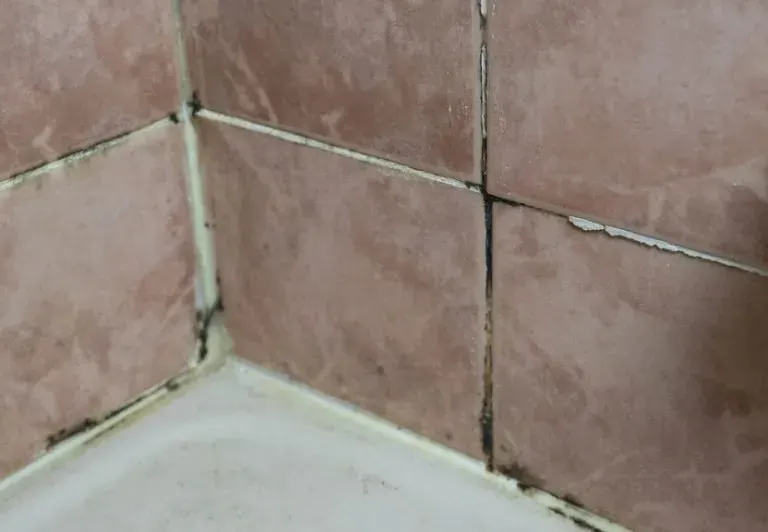
- Grout along the floor or at the base of the walls that stays dark long after showering
- Loose, hollow-sounding or cracked floor tiles, or a floor that flexes; see why bathroom floors feel soft
- A persistent musty or sour odor, a common sign of mold in Florida bathrooms
- Efflorescence (a white, powdery residue) or mildew that keeps returning at the floor line
- Soft or crumbling grout at the curb
Our guide to water damage behind shower walls walks through more warning signs and how they're traced.
Tip: Before assuming the pan is bad, run water onto the shower floor only for a few minutes with the drain open, keeping it off the walls and away from the valve. If stains spread after floor-only use and not after a wall-only test, the pan or drain connection is the likely culprit. Leave plugged-drain flood testing to a pro.
Leaking Shower Pan Repair vs Replacement
Not every damp grout line means a failed pan. This is how we sort a surface repair from a pan replacement:
| Symptom | How we test | Likely fix |
|---|---|---|
| Dark grout at one corner or along the curb | Inspect grout and caulk; water test that area only | Regrout and recaulk at changes of plane |
| Gap or loose ring around the drain grate | Inspect the drain top and its seal | Reset the drain grate and seal |
| Stains next door only after floor-only water use | Floor-only water test with the drain open | Pan or drain connection; replace the pan |
| Leak whenever the valve runs, even aimed at the drain | Run the valve with water kept off the tile | Valve or supply plumbing, not the pan |
| Hollow tiles, a flexing floor or odor that won't go away | Tap test, moisture readings, look below if possible | Full pan replacement and framing repair |
If stains stop after regrouting and recaulking, the pan was doing its job. If they return, patching the surface only delays the bigger repair while water keeps spreading into framing and drywall.
Pan and Waterproofing Methods Compared
There's more than one sound way to build a shower floor. What matters is choosing a complete system and installing it exactly as designed.
| Method | How it works | Where it fits |
|---|---|---|
| Traditional mortar bed with liner | Sloped pre-bed, a flexible liner turned up the walls, then a second mortar bed over a clamping drain | Custom sizes and shapes; a long-established approach |
| Pre-sloped foam or composite tray | Factory-sloped base with an integrated or bonded drain, covered by a membrane | Standard footprints and lighter builds |
| Bonded sheet membrane | Fabric-faced waterproof sheet set in thinset over a sloped bed, seams overlapped | Walls and floors, including curbless designs |
| Liquid-applied membrane | Rolled or brushed coats built to a specified thickness, reinforced at corners | Complex shapes, niches, benches |
| Acrylic or composite shower base | One-piece molded base, no tile floor | Quick, simple replacements |
We choose based on the shower's size and shape, the drain location, whether the entry is curbed or curbless, and how the walls will be built, then keep every component within one manufacturer's system. With a traditional liner, the pre-slope and clear weep holes at the drain are what keep water from sitting under the tile. Our guide to shower waterproofing systems explains how each method works in more depth.
Walls Are Part of the Waterproofing
A pan that's perfect but meets an unprotected wall still fails. Shower walls should be built on cement board or a foam board designed for wet areas, never ordinary drywall, and covered with a membrane that overlaps the pan so water flows down and into it. Niches, benches and valve penetrations each need sealing according to the system's details. That's why we often recommend rebuilding the walls when a pan is replaced in an older shower; tying new floor waterproofing into old, unknown walls is a gamble. The same wall-and-pan tie-in is what makes a tub-to-shower conversion last. See why waterproofing matters more than tile for more on that.
Our Shower Pan Replacement Process
- Diagnose. We look for the source of the leak and rule out plumbing, grout and caulk problems first.
- Demolition. Floor tile, mortar and the old liner come out, plus lower wall tile as needed to tie in new waterproofing.
- Assess the damage. We inspect the framing, the slab or subfloor, and the drain. On a slab, the drain body and its connection are checked. Wood damage or mold in neighboring walls is shown to you before we continue.
- Rebuild the base. New pre-slope or pre-formed tray, waterproof layer, drain connection and curb, all within one system.
- Flood test. The drain is plugged and the pan held full of water, commonly for about a day, and checked before any tile goes down.
- Tile and finish. New floor tile is installed with slope maintained to the drain, then grouted and sealed where appropriate.
Hidden damage is the main reason estimates can shift once a shower is opened; our article on why estimates change after demolition explains how we handle that openly.
What Affects the Cost
- Extent of damage. Rotted framing, a damaged subfloor or mold in neighboring walls has to be repaired before the new pan.
- Pan method. A custom mortar bed, a pre-sloped tray and a one-piece base differ in materials and labor.
- Walls. Tying into existing walls costs less up front than rebuilding them, but isn't always the safer choice.
- Drain work. Replacing or relocating the drain on a slab means opening concrete.
- Size, shape and entry. Benches, niches and curbless entries add detail work.
Our guide on bathroom remodel costs explains how these factors add up.
Related Shower Work
Pan replacement is often the moment to rethink the whole shower: a full shower remodel with new wall tile and valve, or new bathroom tile for the floor. If your grout is just dirty or cracked and the pan is sound, our tile and grout cleaning and regrouting may be all you need, and we'll test before telling you which one you're dealing with. Ask for a free estimate and we'll help you find out what is really happening under your shower floor.
Related Bathroom Services
What Clients Say
“Today's Home Services with Shaun and his crew, he is very knowledgeable about tile and marble and your construction needs. From day one his crew was very polite and professional. They treated us and our home like more than just customers. If you're considering remodeling your home, I definitely would recommend them. They are definitely a five star company.”
— Michael Wojcik
“Today's Home Services were very professional and caring about the outcome of our bathroom remodeling. The employees were respectful, friendly and knowledgeable. I will be using them again as we keep updating our home. It was nice to find a honest, hard working contract that will work at a reasonable price!”
— Greg Ferguson
Bathroom Remodeling Near You
We remodel bathrooms throughout four Gulf Coast counties. Find the page for your community:
Learn More Before You Start
Shower Pans & Waterproofing FAQs
Can you replace the shower pan without redoing the walls?
How long does shower pan replacement take?
How do I know the leak is the pan and not the plumbing?
What is a flood test and why does it matter?
Is a foam or pre-sloped pan as good as a traditional mortar bed?
Keep Exploring
-
 Bathroom Service
Shower Remodeling
When a shower leaks, cracks or just looks worn out, a surface fix rarely lasts. We take it back to the framing and rebuild every layer:…
-
 Understanding
Shower Waterproofing Systems: How Each One Works
Tile and grout are not waterproof. What keeps water out of your walls and subfloor is the layer underneath, and there are three main ways to…
-
 Why
Why Waterproofing Matters More Than the Tile You Pick
You'll spend hours choosing shower tile and minutes thinking about what goes behind it. That's backwards. Tile is the finish you see; the waterproofing layer is…
-
 Questions
Water Damage Behind Shower Walls: Signs and Next Steps
Loose tile, cracked or darkened grout, peeling paint on the other side of the wall and a musty smell are classic warning signs. Once you suspect…
-
 Bathroom Service
Walk-In Shower Installation
A walk-in shower should be easy to enter, comfortable to stand in and simple to keep clean. We design and build curbed, low-threshold and curbless walk-in…
-
Bathroom Remodeling in Bradenton, Sarasota & the Suncoast
From a tired hall bath to a complete primary-suite rebuild, we plan, demo, waterproof, tile and finish bathrooms across Manatee, Sarasota, Charlotte and south Hillsborough counties,…